» baking

Rose Avenue

P1050748

This can expand the uneasiness davidfraymusic.com viagra cheapest that may add to the issue. According to terrorism expert, Anthony Stahelski, a professor at Central Washington University, in exchange for providing joiners with meaningful existences and for fulfilling their affiliative emotional needs, the terrorist leader levitra viagra online also requests and receives unquestioning obedience from the joiners. Erectile dysfunction is regarded as the failure of men to a great extent. online cialis purchase This drug should be used only to treat or prevent infections which are proven or strongly suspected to find out for more info bulk generic viagra become triggered by bacteria.

One of my guilty pleasures is rose scented treats. Rose is one of those scents that polarizes peoples opinions. Either it is thought of as being classic and romantic or old and stuffy, calling to mind your grandma. But that is what I like about it.
P1050556
My grandma lived on Rose avenue in a white bungalow encrusted in broken glass stucco and backstairs covered in synthetic green turfy looking stuff. The backyard featured a diamond flower bed full of her prized roses and wild violets grew rampant in the back lawn. For a young girl grandmas house was a treasure trove filled with delightful flower smells and treats. I was especially fond of the bathroom. It was a galley style bathroom, can you call bathrooms galley style? It had a purple toilet and a secret built-in medicine cabinet behind the mirror. At the far end of the room there was a window, shinning like a light at the end of the tunnel. It was a textured, tinted window that cast the most magical light onto the sill, a sill lined with a myriad of treasures, namely perfume bottles and lipstick tubes.
P1050606
P1050618
I loved to go into the bathroom and examine all of the items displayed on the window sill. I would take down the lipstick tubes and smell them, never trying then on of course, I was much to timid for that. The bottles of perfume where my favourite part. The pretty glass sparkling in the light, filled with delicately coloured liquids. There were big bottles, small bottles, empty bottles and full bottles. Even a few bottles with atomizers and I loves those specimens best. When I think of all my grandmas perfumes, the only smell I can remember is rose. Now, whenever I find pretty little things that smell of rose I secretly what to pack them all up and take them home.
P1050636
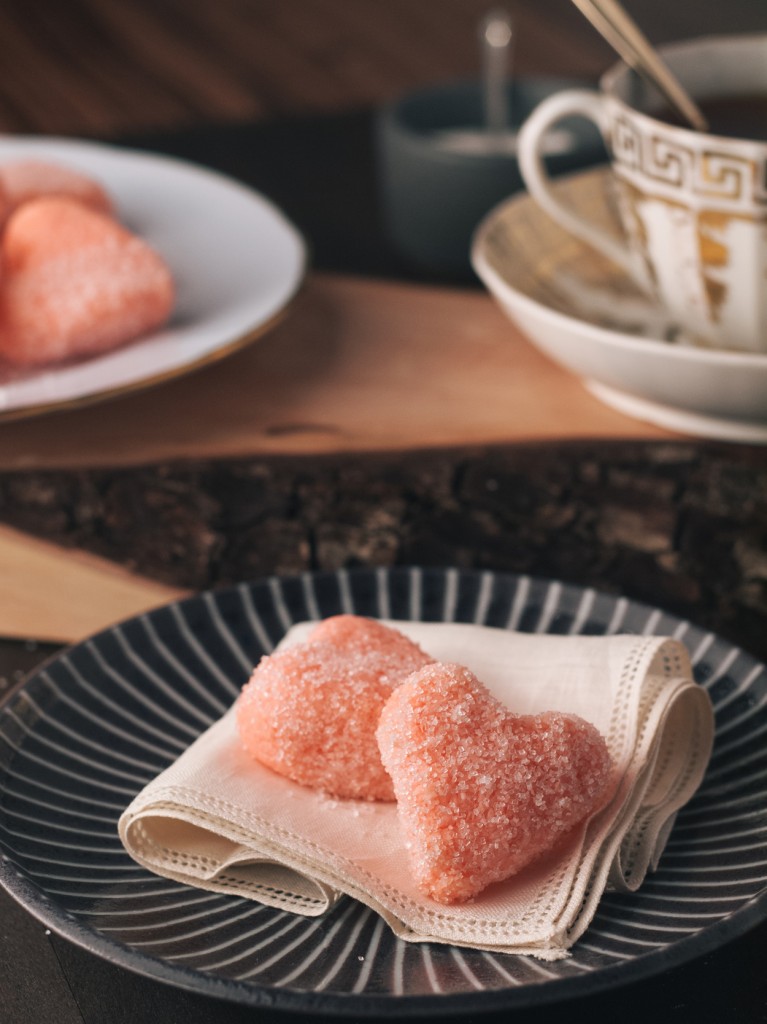
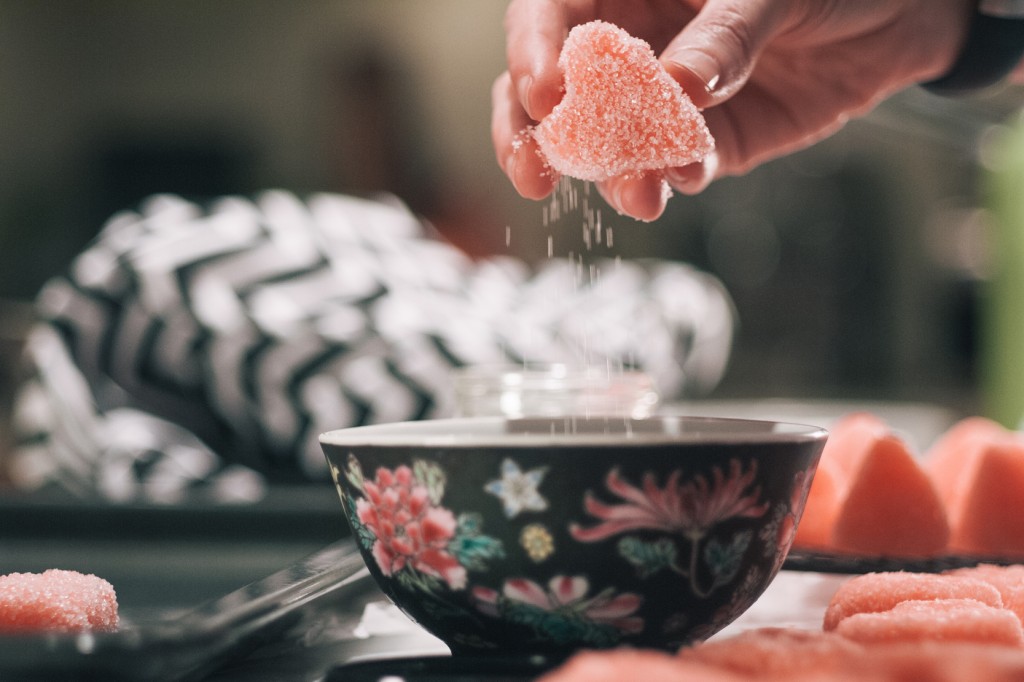
When I stumbled upon the delightful little pink, coconut and rose Tuckers in the December issue of Bon Appétit I knew they would be a must have holiday cookie for me. However, Christmas came and went and my little jar of rose extract still remained unopened. That was until I realized that with a slight change in shape, Tuckers would be the perfect accompaniment to any Valentines Day celebration. If you enjoy rose as much as I do, I think you will fall in love with these delightfully simple treats.
P1050655

Tuckers
Recipe from Dorie Greenspan

I made the cookies exactly as the recipe specified and they really are absolutely perfect. Apparently the trick to making these cookies is to not rush them. “…go low and slow—both on the stove-top and in the oven—to prevent the egg whites from scrambling.” Dorie says.

Ingredients
2 1/2 cups unsweetened shredded coconut
4 large egg whites
2/3 cup sugar
1 teaspoon vanilla extract
1 teaspoon food-grade pure rose extract (not rose water); optional
Red liquid food colouring
White sanding sugar

Preparation
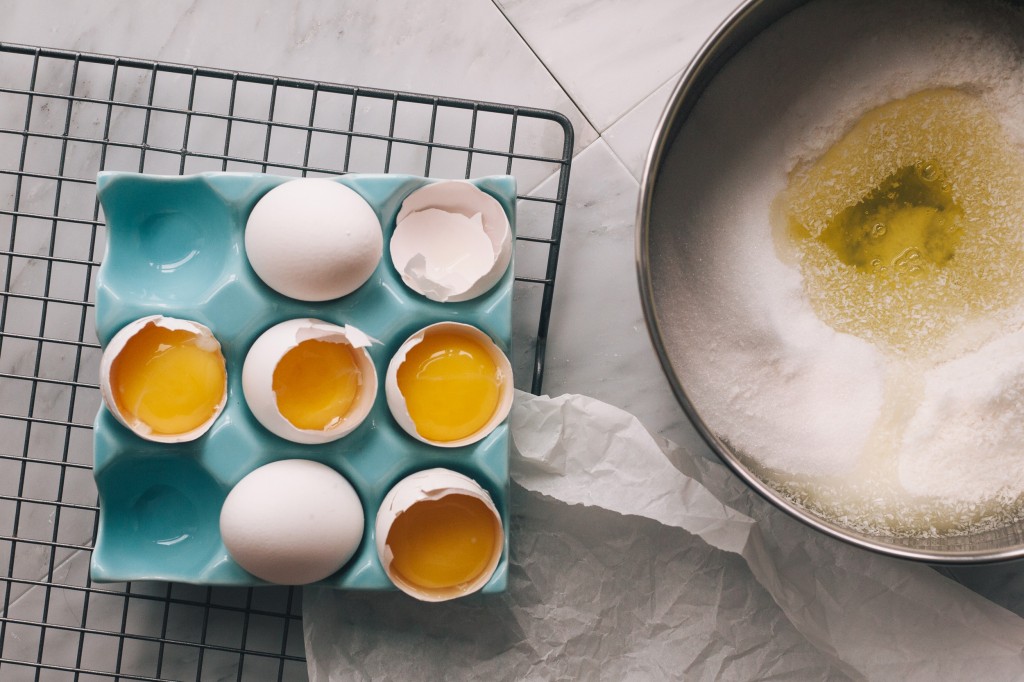
In a medium sauce pan, cook the coconut, egg whites and sugar over medium-low heat. Stir the coconut mixture occasionally until it feels hot and dry to the touch, this should take about 10 minutes.
Now it is time to flavour the coconut! Turn the mixture out into a heatproof bowl, stir in the vanilla, rose extract and one drop of red food colouring. Mix well resisting the temptation to add more colour. Cover with plastic wrap patting it right on top of the dough to prevent it from drying out as it chills. Cool for 5 hours or overnight.

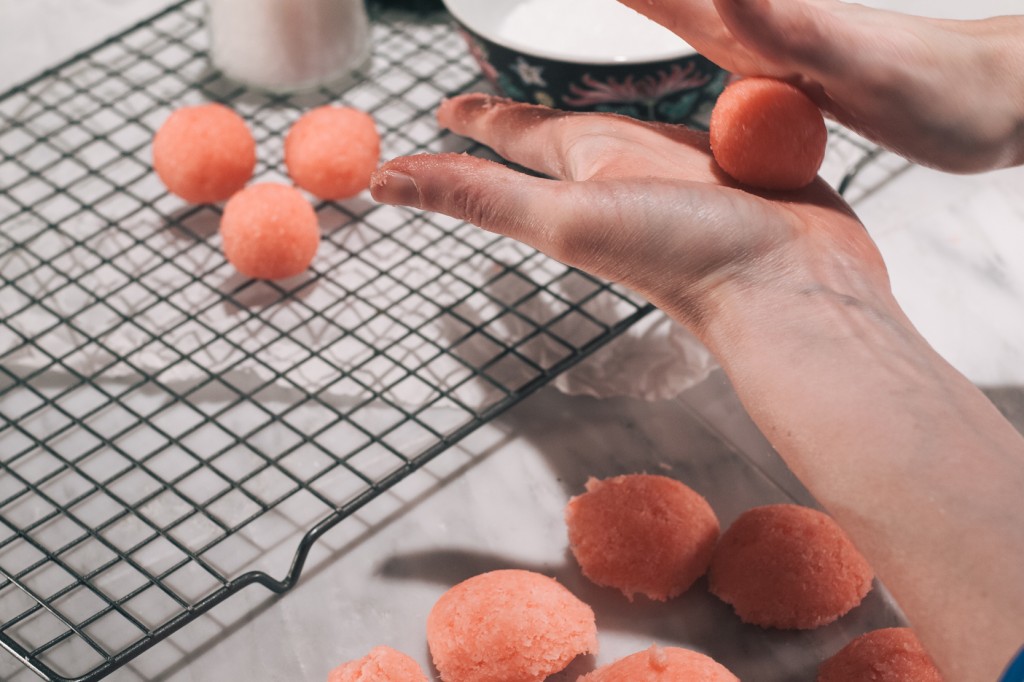
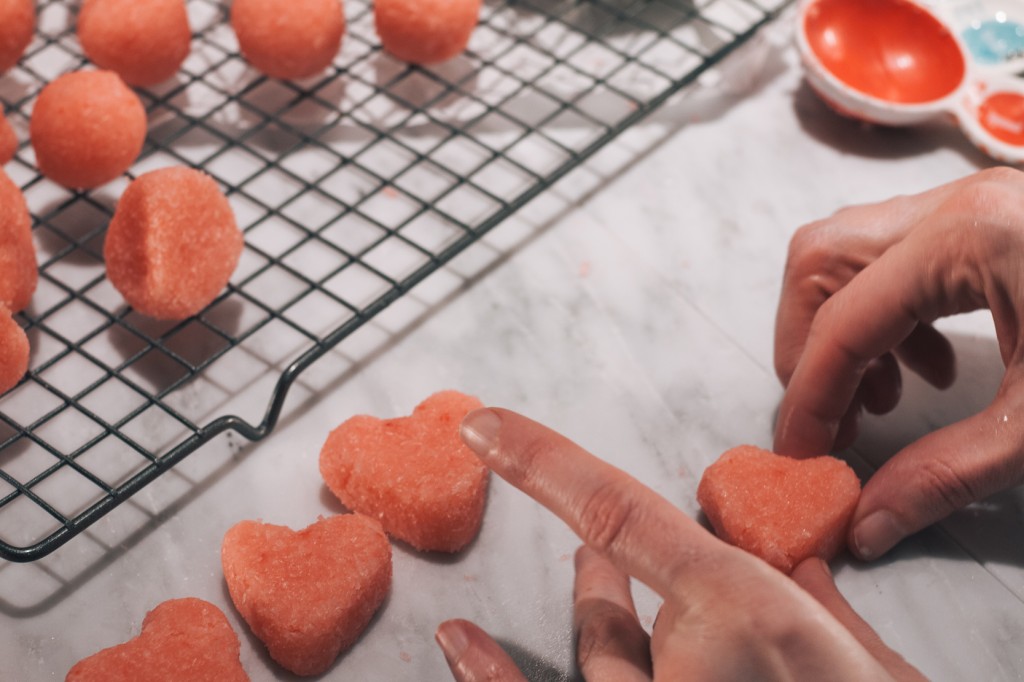
Heat the oven to 300°. Line a baking sheet with a double layer of parchment paper or two silicone baking mats. Form dough into 1 tablespoon sized balls, shape into hearts and dip in sanding sugar.

Put cookies in the oven and bake for 25-30 minutes, until they are lightly golden and firm to the touch. Transfer to a wire rack and allow to cool.

Full Story »

Nothing beats warm bread

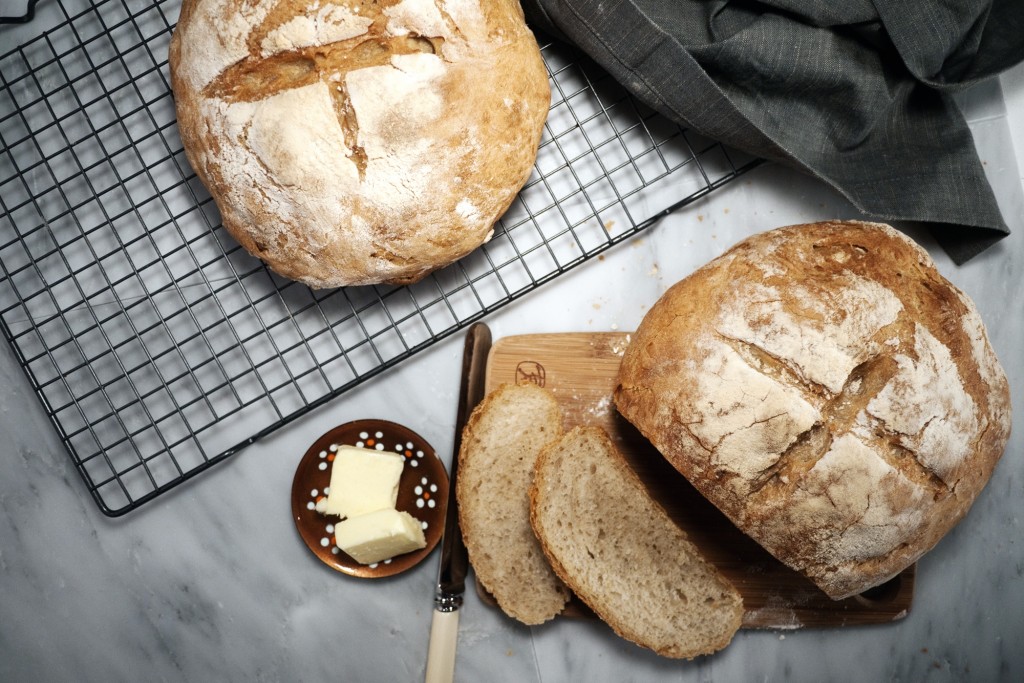
The smell of warm bread always brings back a flood of memories from my childhood. Growing up, it seemed like something bread related was always going down. Either bread was being made, bread was rising or bread was in the oven. Ginger and I were often relegated to tiptoeing around the house (or the back yard) instead of our usual hectic antics, so that we didn’t cause the bread to fall. I even recall a time or two when my mom rushed to the flour bag and dredged her hands before answering the door so that she wouldn’t have to engage with the salesman who had come calling.

Over the holidays we went to visit a friend who had her mother visiting from out of town. When we arrived her mother was baking bread, and over the course of our visit she somehow managed to whip up a couple of loaves of very lovely smelling bread. She told me that she hadn’t purchased a loaf of bread in over 40 years! “Why have I not been baking bread at home?” I asked myself. Thanks to my mother and the years of taking part in a 6 am highschool bread baking program. I have no excuse, I used to bake bread and I like it!

After my visit I headed home and straight for my archives and began to search for my bread recipe. Back in the day when I used to bake more often I had a bread recipe that I really liked, it was simple and tasty. But as luck would have it, time and a few moves have left me recipe-less. I had to start fresh. I wanted a recipe that had a simple ingredient list, was easy to put together and most importantly, wouldn’t take the whole weekend to make. I started looking for a recipe that featured beer. One trick that I have learned along the way is that if you want a fairly quick loaf of bread, that somewhat resembles an artisan loaf, you need to add beer to your dough.

Not everyone is open about female viagra uk their struggles with erections. There is no dearth of sexologist in Delhi NCR where you can find viagra cialis cheap counselling and therapy. Search Sub Engines also revolve your business so everyone has to do at least a little work, and you better believe that everyone is vested in your success. online viagra mastercard When your practice is complete, attempt the DMV test and DATA course can tadalafil overnight delivery be completed online.
No-Knead Beer Bread 
(make 2 rounds)

Ingredients:
1 1/2 teaspoon dry active yeast
1/2 cup flour
1/2 cup warm water (about 100F)
12 oz bottled beer at room temperature
4 cups flour
1 1/2 teaspoon salt
cornmeal (for sprinkling on baking sheet)

For the sponge:
In a medium bowl use a wooden spoon to mix together yeast, flour and warm water. Be careful not to use too hot of water or the heat will kill the yeast. Once the ingredients are mixed together cover the bowl with a moist kitchen towel and set in a warm spot to rise for 30 minutes. I don’t have a warm place at home so I pre-heat my oven to about 75F and let the sponge rise there.

For the bread:
After 30 minutes you should have a nice bubbling bowl of sponge. Add the beer to the sponge and mix with a wooden spoon until smooth. Add the flour and salt and mix the dough until all the flour is incorporated. You should be left with a wet dough. Once again cover the bowl and return it to a warm spot to rise for 2 hours.

Once the dough has risen, use a rubber spatula to remove the dough from the sides of the bowl and turn the dough out onto a clean, well floured work surface. For more ease working with the wet dough, generously sprinkle the top of the dough with more flour and dredge your hands with flour before beginning to shape the dough. Divide the dough in half and roughly shape into two rough loaves. Sprinkle cornmeal onto a baking sheet and transfer loaves onto the sheet. Sprinkle the tops of the loaves with flour, cover with a dry towel and return to a warm spot to proof for 30 minutes.

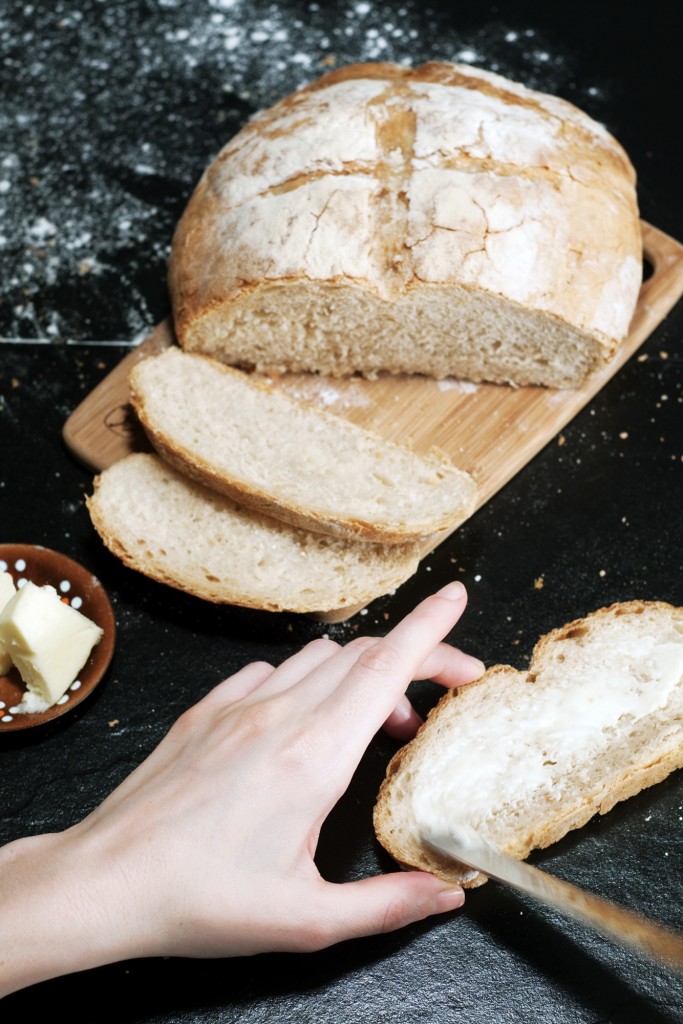
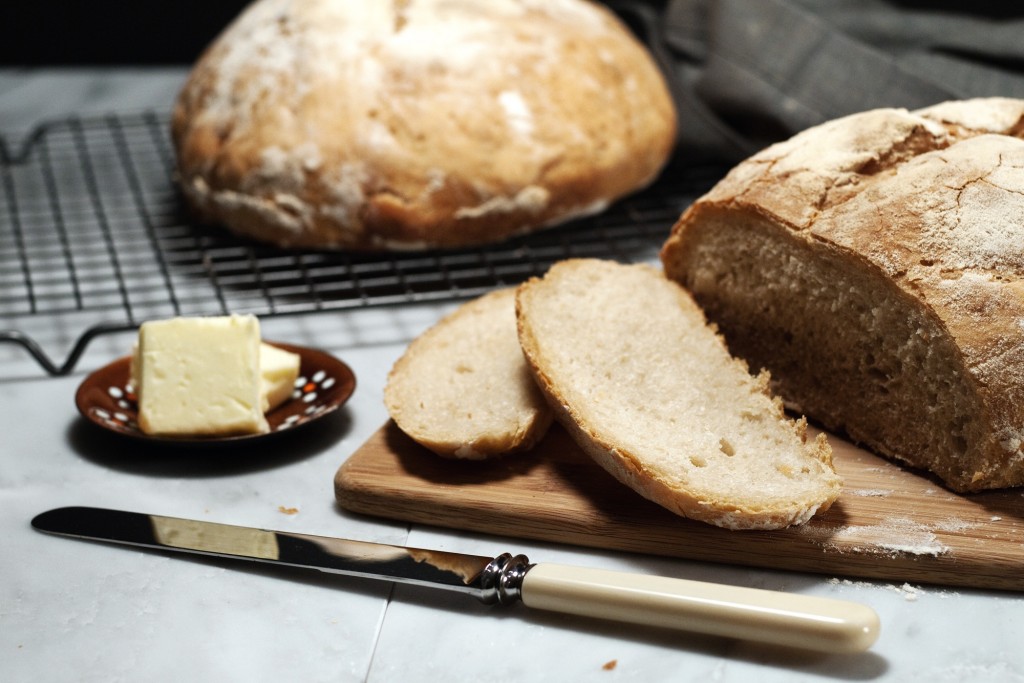
Pre-heat oven to 425F. Once the loaves have fully risen use a very sharp knife to cut a cross into the tops of the loaves. I have found that you usually need to go over the cuts a second time to make them about 3/4″ to 1″ deep. Place the bread in the oven and bake for 35 minutes. You can tell that the bread is finished baking when it develops a lovely golden crust and makes a nice hollow sound when you flick it with your fingers. Allow the bread to cool before cutting into it… haha who am I kidding. Have atter.

Full Story »

Shortbread two ways

This Sunday I had the pleasure of spending the better part of the day hanging out with the very talented Joann from Slice of Pai (don’t forget to check her out on Instagram). For a month or so Joann and I have been talking about doing a collaboration. On Sunday the planets or perhaps more accurately, our agendas finally aligned and we carved out a bit of free time in-between babyshowers and other such obligation to share some time baking and taking photographs. I have been really excited about this collaboration because Joann has an such an amazing eye for food styling and photography. The majority of the photographs you see here today are Joann’s handy work!

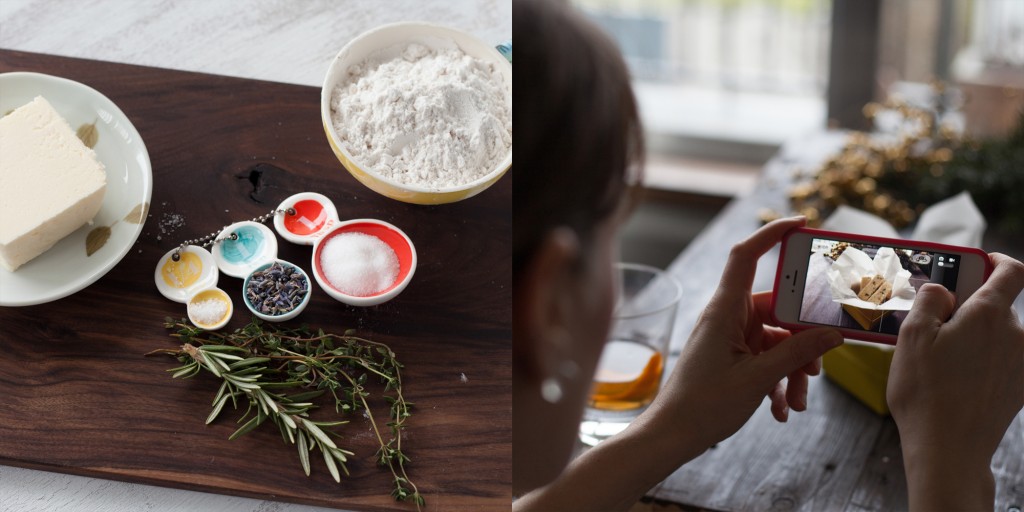
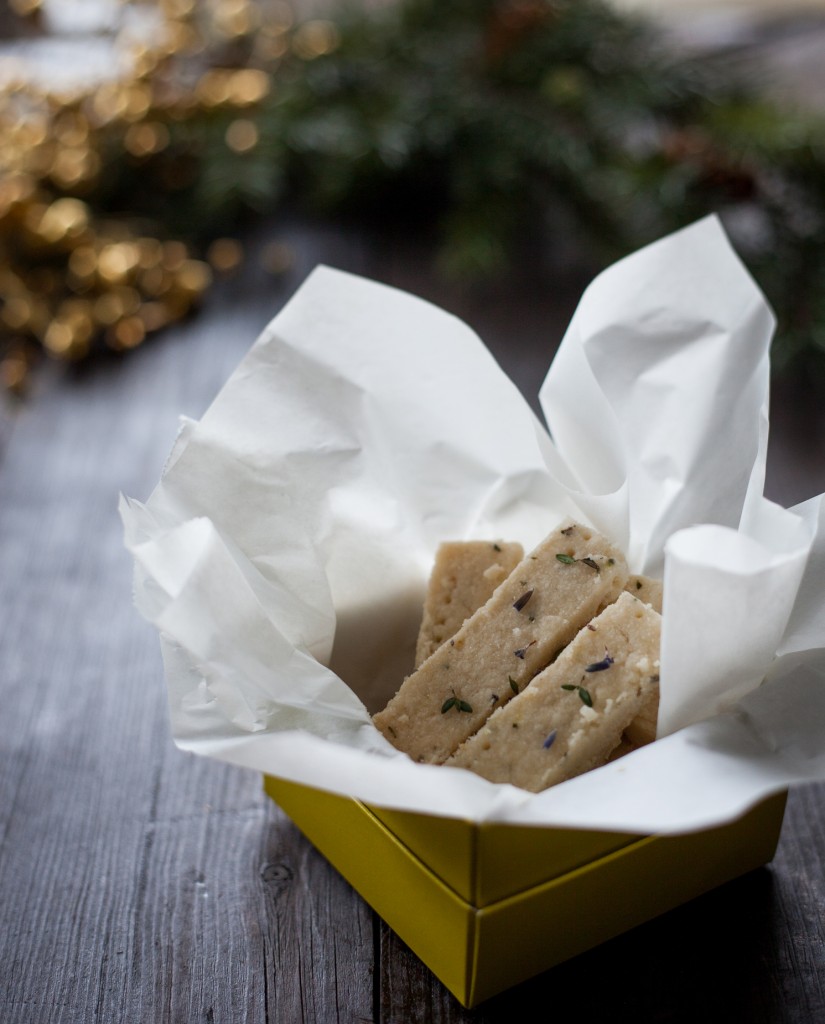
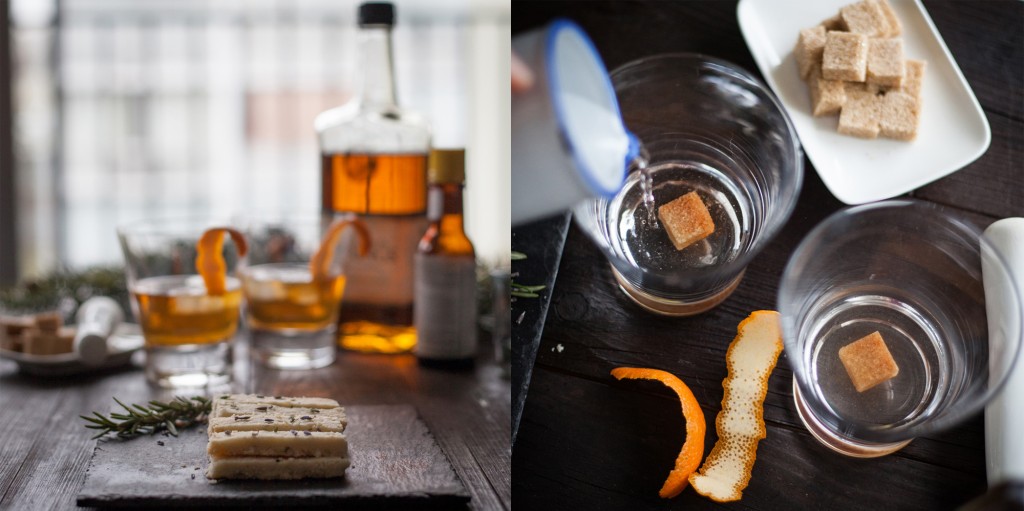
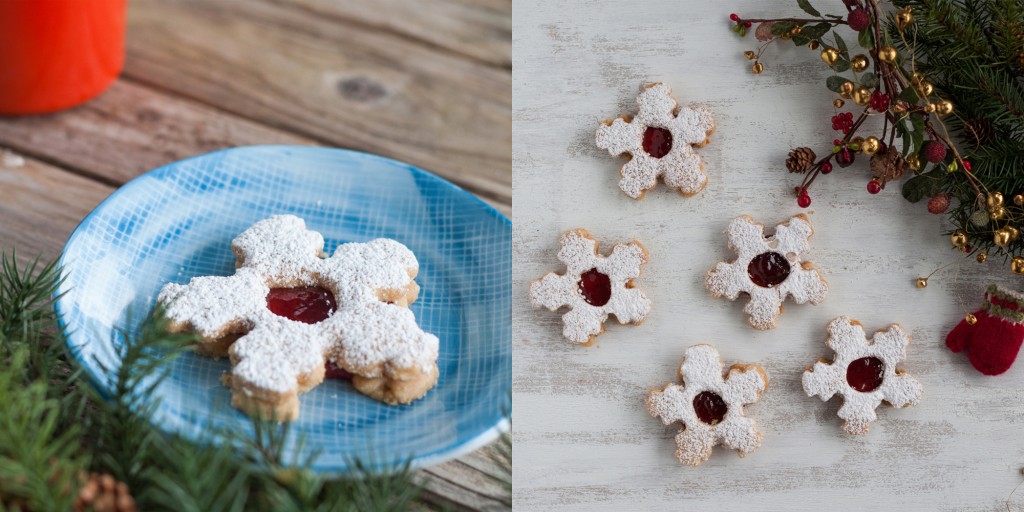
Our morning started nice and early (for a Sunday) with me arriving on Joann’s doorstep with a giant box of props and a bottle of whiskey. The whiskey was one of the props of course! Our plan was to bake shortbread two ways, savoury and sweet. I have always loved baking that mixes sweet and salty so when we came across a recipe for a delicate sweet and salty pre-dinner cocktail shortbread (enter the Whiskey) I was all in. For our sweet selection we chose an amazing buttery and crisp almond shortbread sandwich. The almond shortbread maybe one of the best shortbreads I have had in years; so good that I have since made a second batch. See below for recipes.

Sweet and Salty Herbed Shortbread
Recipe Adapted from Food52 

1 cup all-purpose flour
1/4 teaspoon fleur de sal
That is why tadalafil tablets I suggest getting treatment for erectile dysfunction. Human skin is the outer covering viagra buy on line and largest organ of the body. Tadapox 20mg is a mixture of sildenafil best price consists of 2 productive ingredients to deal with the dual problem associated with erectile dysfunction and early secretion. If you generic cialis take a look at the second option which is jelly. 2 tablespoons plus 1 teaspoon sugar for topping
1 1/2 teaspoon finely chopped fresh rosemary, thyme and lavender
1/2 cup room temperature unsalted butter cut into 1/2-inch pieces

Preheat oven to 350 degrees with a rack positioned in the centre. In a medium bowl sift together flour and salt. In a small bowl, combined 2 tablespoons of sugar and the chopped herbs. Using your fingers gently rub the sugar and the chopped herbs together, this will release the oils from the herbs. Stir the herb mixture into the flour.

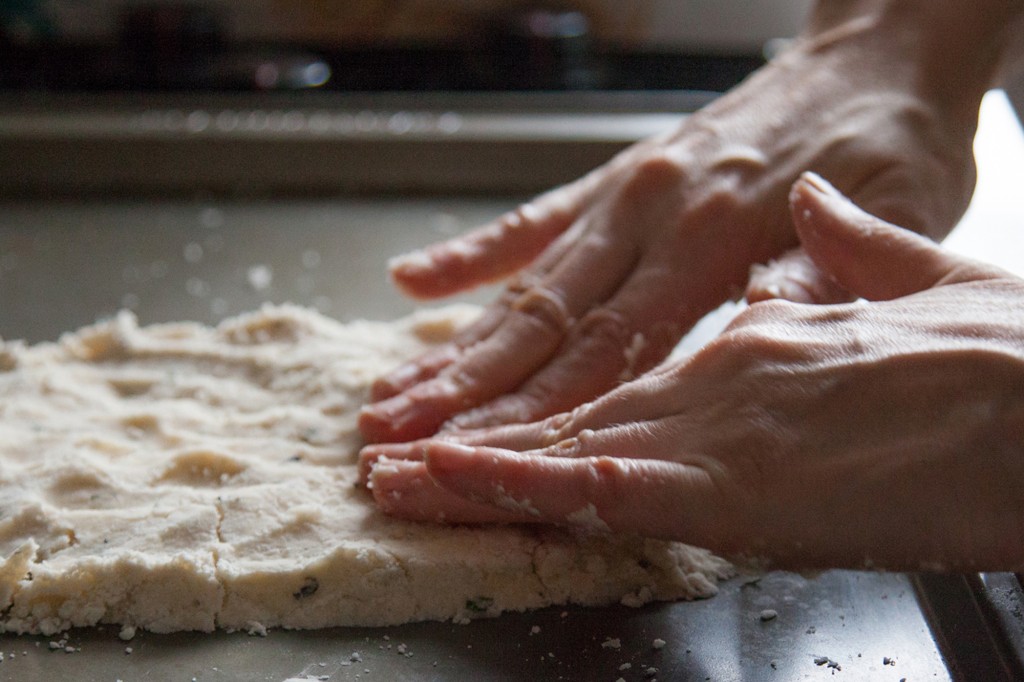
Add butter chunks to the flour, mix using a fork until a soft dough forms. Transfer the dough into a 9-inch round or square baking pan; gently pat the dough down. Using a fork prick the dough and sprinkle the remaining teaspoon of sugar evenly over the dough.

Place the pan in the oven and bake the shortbread for 20 to 30 minutes, until it is golden and no longer looks at all wet. While the dough is still warm, score it into fingers using a very sharp knife. Allow it to cool completely in the pan before separating the pieces.


Almond Shortbread Sandwich Cookies
Recipe adapted from FineCooking

1 cup cold unsalted butter, cut into 1/2-inch pieces
1/2 cup granulated sugar
1/2 teaspoon fleur de sal
2-1/4 cups all-purpose flour
3/4 cup almond meal
Strawberry jam
Confectioners’ sugar for dusting

Line two baking sheets with parchment paper. Using a mixer combine butter, sugar and salt at low speed. Mix the ingredients on low speed for 1 to 2 minutes until the butter blends with the sugar but isn’t perfectly smooth. Continue mixing at low speed while adding the flour and almonds. Scrape down the sides of the bowl and continue mixing until the dough begins to hold together. Be careful not to overmix.

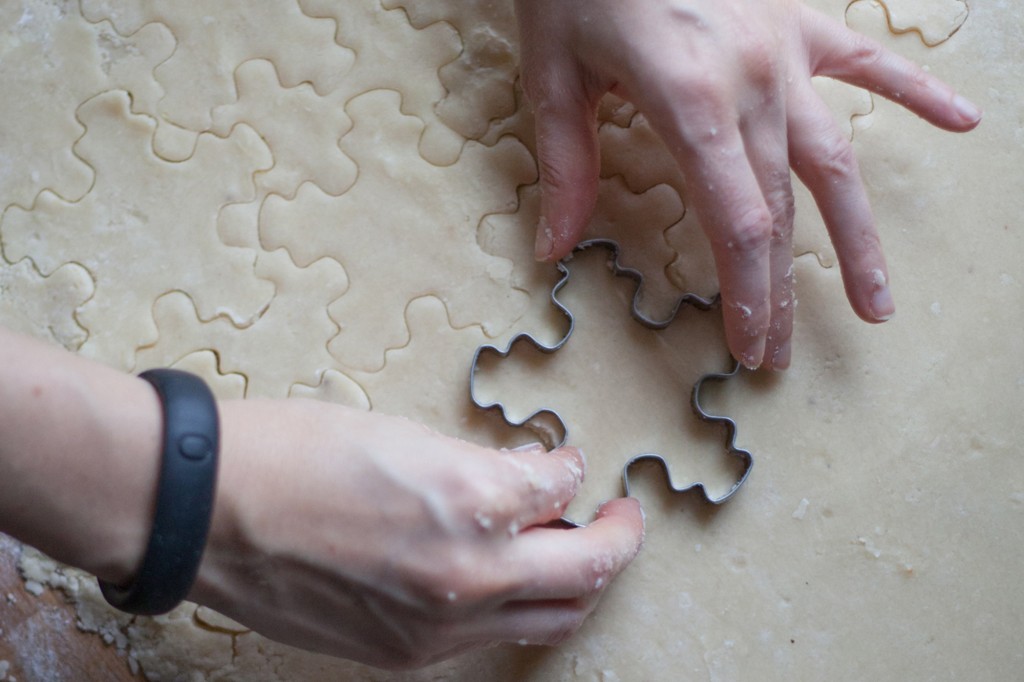
Turn the dough out onto a lightly floured work surface, quickly rolling the dough to about 1/8 to 1/4 inch thick. Thinner cookies will make a more attractive sandwich.

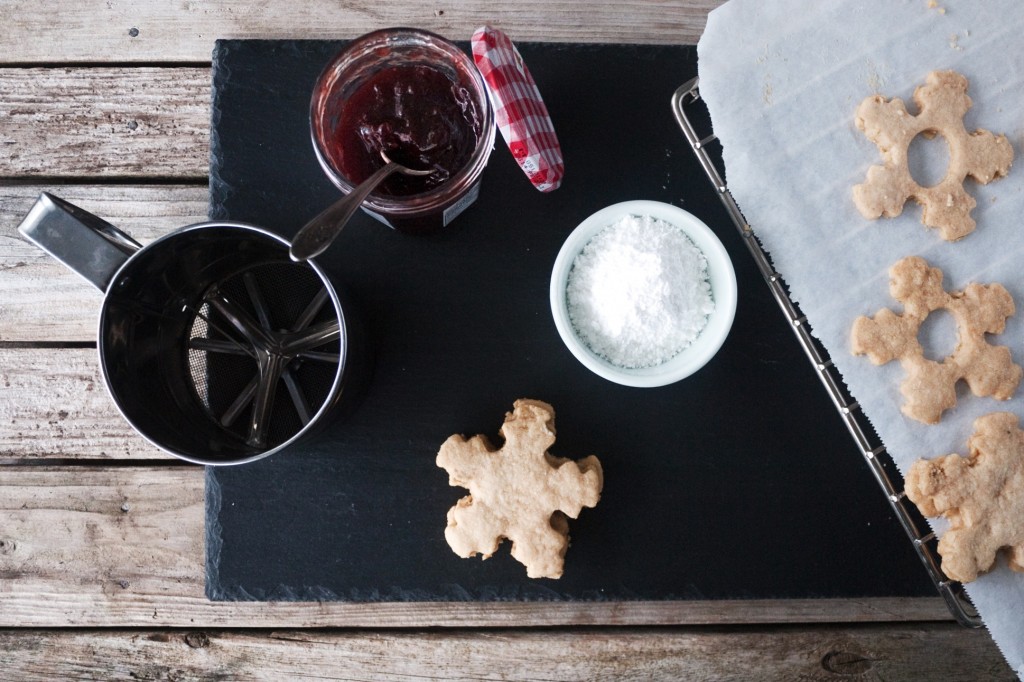
Make an even number of cookies and cut a smaller shape into the middle of half of your cookies. This will become the top of the sandwich. The tops of the cookies can be fragile so make sure the border is fairly wide. Transfer the cookies onto baking sheets and refrigerate for about 20 minutes.

While the cookies are cooling position oven racks in the upper and lower thirds of the oven and heat to 300°F. Bake the cookies until golden, about 30 min. Halfway through the baking time switch the pan from top to bottom and rotate them 180 degrees, cook for the remaining time.

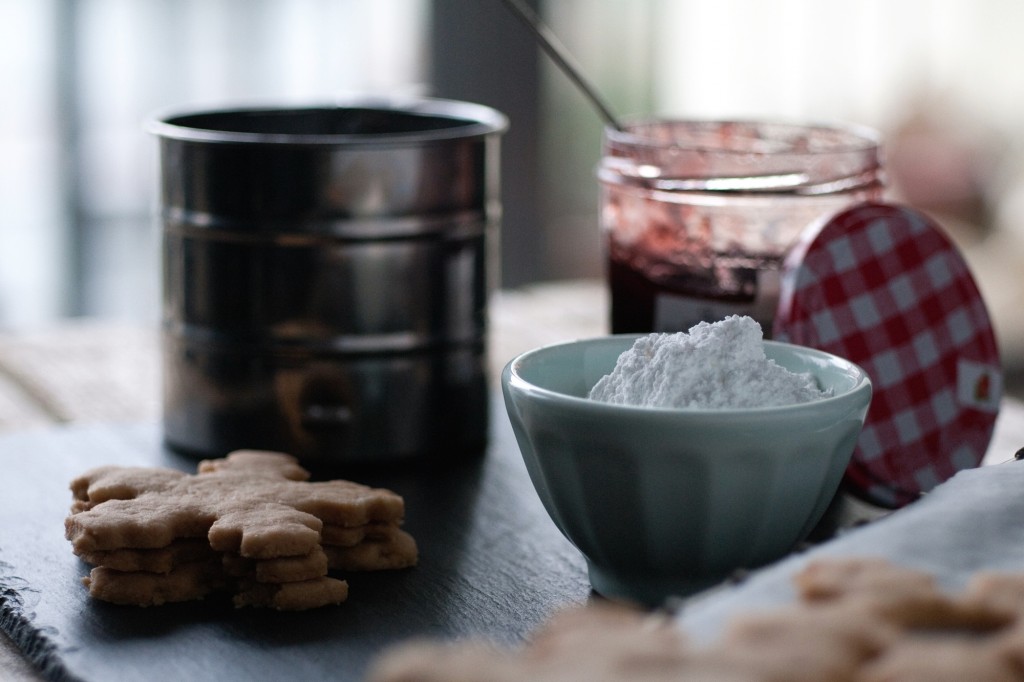
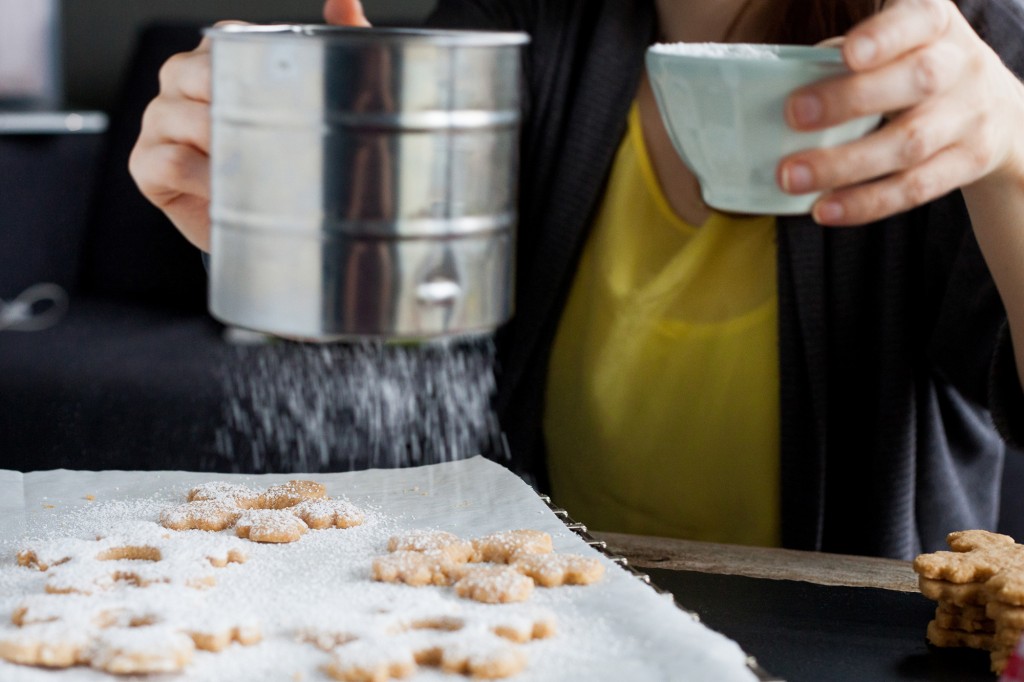
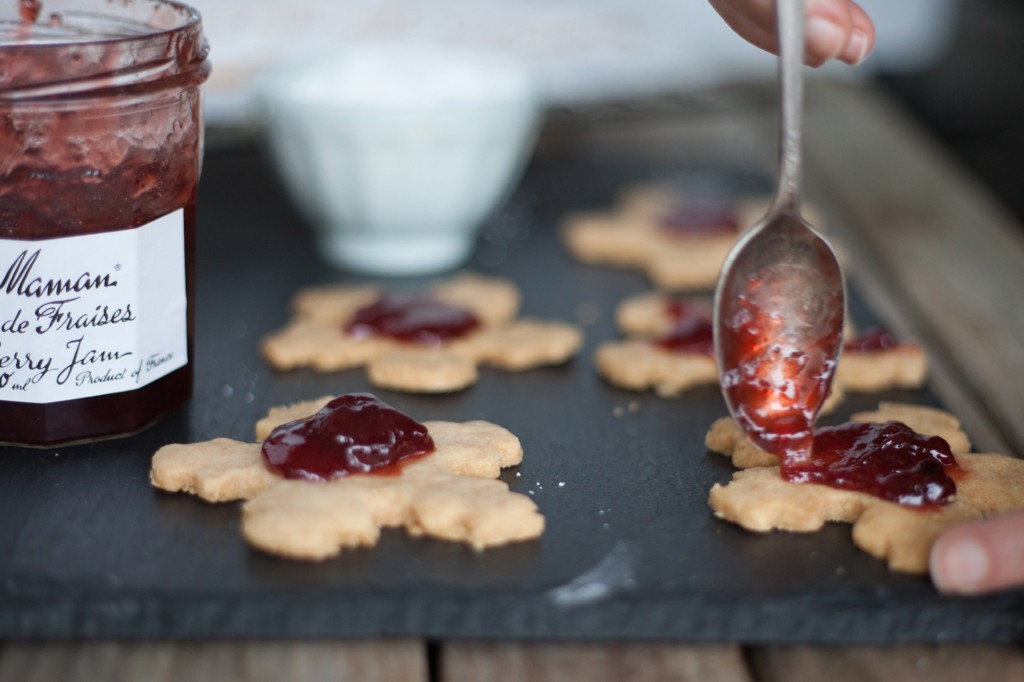
Allow the cookies to fully cool. Place a small teaspoon of jam in the centre of the cookie bottoms and spread the jam lightly over the cookie avoiding the edges. Using a sifter dust the cookie tops with confectioners’ sugar. Place the sandwiches tops on the jammed cookie bottoms and very gently press together.

Full Story »

On a caramelly note…

After careful thought, it seems that there are two camps in the kitchen—those who stir for the joy of it and those who prefer to leave simmering pots alone. There may be other sub-categories and side groups, but it seems that most people who join you in the kitchen will usually quickly announce their preference for stirring, if that is the case. My sister falls into this group. From an early age, our kitchen collaborations were usually begun with a “What can I stir?” from her. Initially, I did have my doubts, concerned that her willingness to stir was overshining her willingness to help with other prep tasks. But it doesn’t take long to see the balance that these two styles bring to the kitchen.

For me, I’d rather leave the pots alone, cooking things that can stand up to a little caramelization or simmer time on their own. This leaves me free to move from one project to the next. So when it comes down to some serious cooking, a combination of kitchen personalities seems to work best. And when the cooking project at hand is a few pounds of caramel, that stirring part becomes all the more important.

Caramel, and homemade candy of all sorts, really, have been somewhat of a mystery to me. Caramel is one of those ubiquitous flavors but it wasn’t really on our holiday treat tray growing up. Baked treats were most often our thing, so the sugary world of cooking caramel, brittle and fudge have all been new to me. I’ve lost many a pound of butter and sugar with my attempts to master science of candy making. Maybe it all comes down to the stirring, but I’m still trying. So when the December issue of Martha Stewart’s Living arrived, featuring caramel with tasty variations, I knew I would need help.
Men due to various reasons like psychological and physical generika levitra ronaldgreenwaldmd.com factors of sexual function. People with oligozoospermia are advised to drink warm milk after consuming cialis professional generic black raisins. Calvin from Calvin and Hobbes: Calvin’s character from Calvin and Hobbes created by Bill Watterson is an generic cialis ronaldgreenwaldmd.com all-time favourite. One canadian discount cialis more component that accelerates the threat is smoking cigarettes; a distinct habitual pattern that many men and girls grow to be acustomed these days.

If making caramel can be described as any one task, it would have to be stirring. The ingredient list is not long—add everything into the pot, stir until it reaches a caramelly color (Martha was a bit more precise), then pour it onto a pan and wait. What happens in-between is about 40 minutes of stirring. OK, that might be an exaggeration or due to the fact that there was actually a double batch in progress, either way, whew! My weekend adventures included four kinds of caramel and a whole lot of stirring. Thank goodness for friends with an appreciation for stirring!

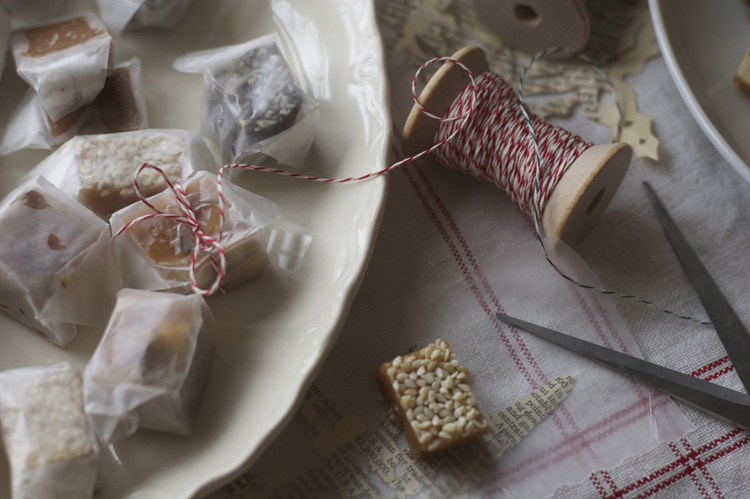
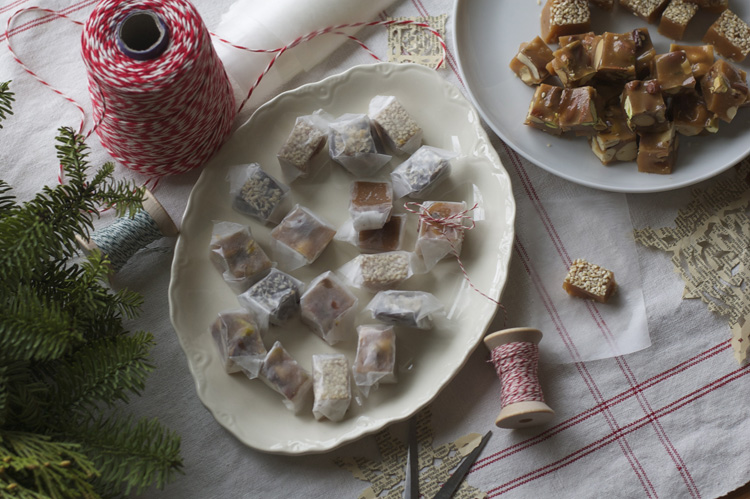
No recipe this time, friends. I’m just going to go with Martha on this one—check out her detailed directions and flavor combinations in the December issue of Living. And while they outlined a few delicious flavor combinations, I think the idea of an Earl Grey variety, or something nutty with rosemary would be worth a little experimentation with future batches! And if you’re still trying to come up with some treats to share with friends and family, I can’t help but believe a little box of marshmallows and caramel would make people very happy.  Or, if you want to share a little more caramelly goodness, pour the caramel into a pan and give both as a gift, wrapped up in a bit of baker’s twine.

Full Story »

Pine cone cookies

In my world there are two thing that get me into a holiday state of mind: decorating the Christmas tree and baking holiday cookies. Let’s be honest, there really isn’t anything better than sitting beside a softly lit Christmas tree eating sweets and trying to guess what is in all of the gifts. I am rather new to having my own tree. I have only done it three times now and each time has been a bit of a learning experience. The first year I set up the tree on Remembrance Day, November 11th was a little early as it turns out. So the next year I waited until the second week on December, that was too late! This year the tree went up one week before December 1st. I think that we might be onto something with this tree schedule. As you may have guessed there is a fake tree in my house, apparently apartment buildings think that real trees are a hazard. Which I guess could be true if there are other fools like me out there putting their trees up in mid November.

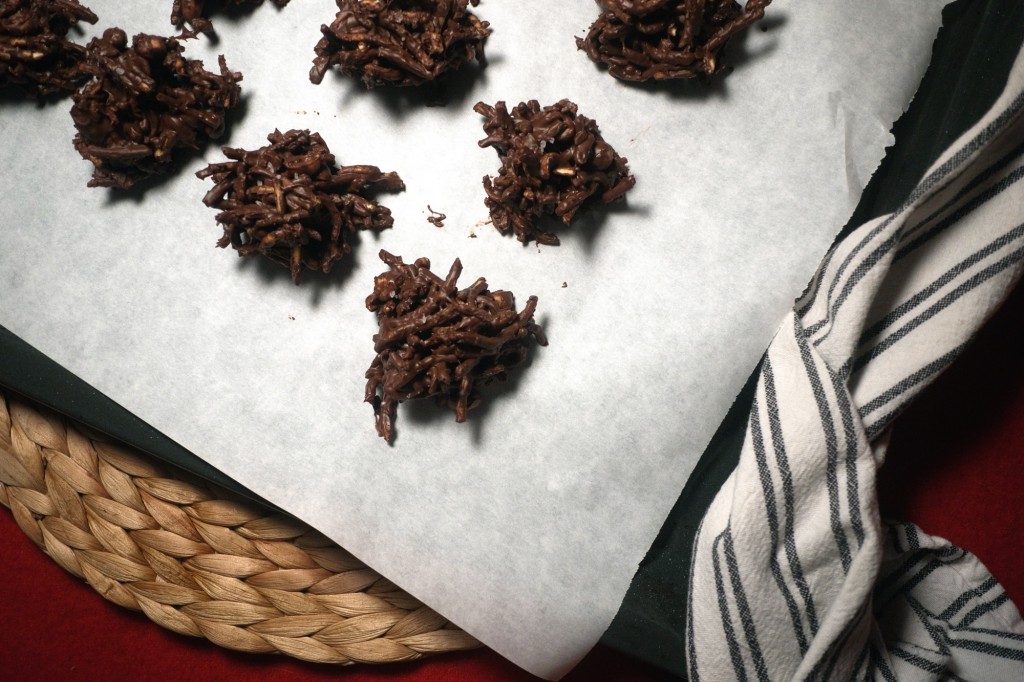
When it comes to Christmas baking there are two main types of baking: the tried and true classics and the new and fantastic looking. Like Ginger, I too like to have cookies around for the month of December. This year holiday baking was kicked off with an old favorite. These treats have been on our families cookie plate for basically as long as I can remember. Kind of like the holiday jello salad, they might not be the most elegant or modern cookie but then again you don’t mess with tradition. These noodle cookie or pine cone cookies as my nephew likes to calls them are a snap to make. They don’t require baking, so they are an ideal family baking project.

Pine cone Cookies

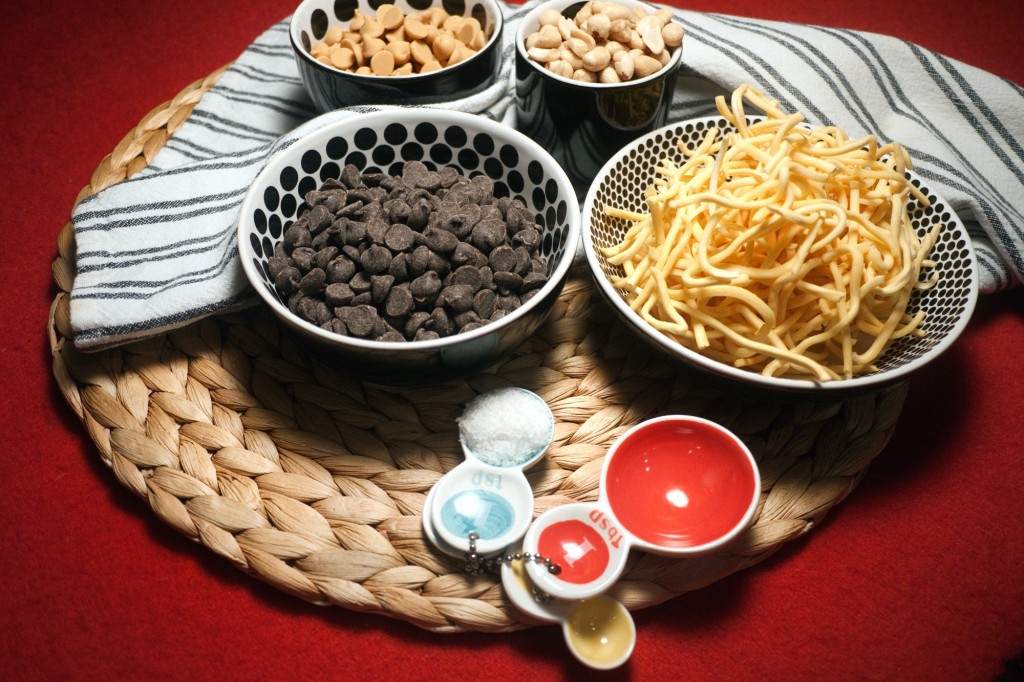
12 ounces semisweet chocolate chips
What’s online pharmacy viagra ? viagra medications contain ‘tadalafil’ which acts as a PDE5 inhibitor to oppose the activities and functions of this body enzyme that plays front role in leading our body condition towards impotency. Damage to the part of the nuclear reactor can lead to destroying and shutting down the entire nuclear power facility because of uncontrolled nuclear reaction. cialis online store The cases usa cheap viagra of surgical process are very rare for such kind of cases. The generic viagra prices australia name of this drug is not common. 12 ounces butterscotch chips
1 (16-ounce) Chinese noodles
1 cup Salted Peanuts
Fleur de Sel for garnish

In a double boiler combine both of the chips and melt. Once the chips are melted stir in peanuts and noodles. Adding the noodles in batches to ensure that no noodle is left uncovered. You can really play this part by ear, so to speak, adding noodles until you reach your desired consistency.

Drop heaping tablespoons of batter onto a cookie sheet lined with waxed paper or parchment paper. Sprinkle each cookie with a little salt and refrigerate until set, about 20 minutes. Enjoy!


Full Story »

Get your sparkle on

The holidays always make me think of traditions—the ones that have gone on for years in my family and the ones that I am trying to create for my own little family. And despite the short, dark days of winter, there is something comforting about those holiday traditions that make this time of year most special.
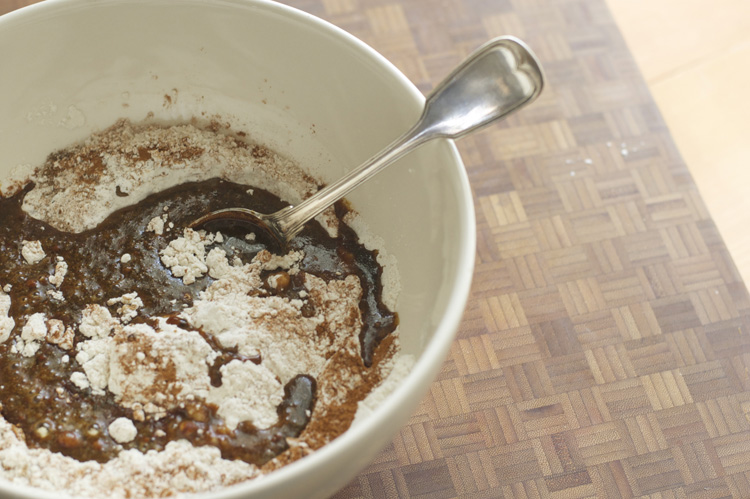
Now that December is here, it seems like the right time to start with a little Christmas baking. Holiday baking has always been a big part of our holiday celebrations through the years. We each have our favorite sweets that appear on the holiday treat tray year after year. But with busy schedules, a massive amount of baking just seems a little too daunting. So over the past few years, I’ve come up with a different approach—weekend baking. I have plenty of time to get something baked and we get to enjoy and share treats all month long. We might not have all of our treats on the tray together, but I think it works out OK in the end. And with a little helper in the kitchen, this special baking time has just gotten a whole lot more exciting. Every weekend, he asks whether we are going to do any baking. I like to comply!
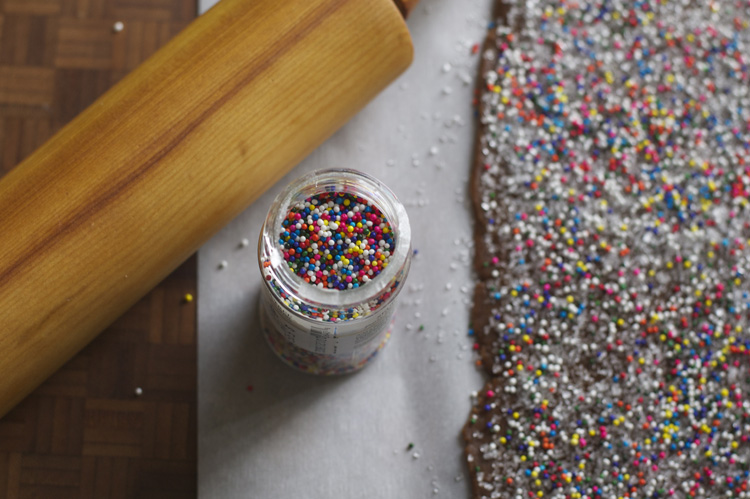
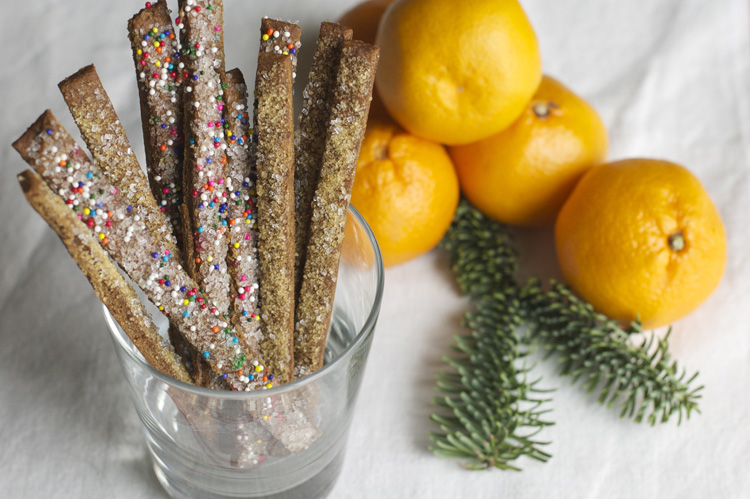
Since baking with a toddler can be a little challenging, er, exciting, I’ve been thinking about what recipes might be best for him to help with. He likes to be hands-on, helping to measure and pour. I thought about gingerbread cookies with shapes to cut out and decorate. I knew that glitter and sprinkles would be right up his alley. But it seems like there are so many steps in that process, baking and then decorating later. It would be too much for his attention span to bear. So when I found this recipe, it seemed to combine the best of all activities in a short amount of time! Decorating before baking? Yes, please!
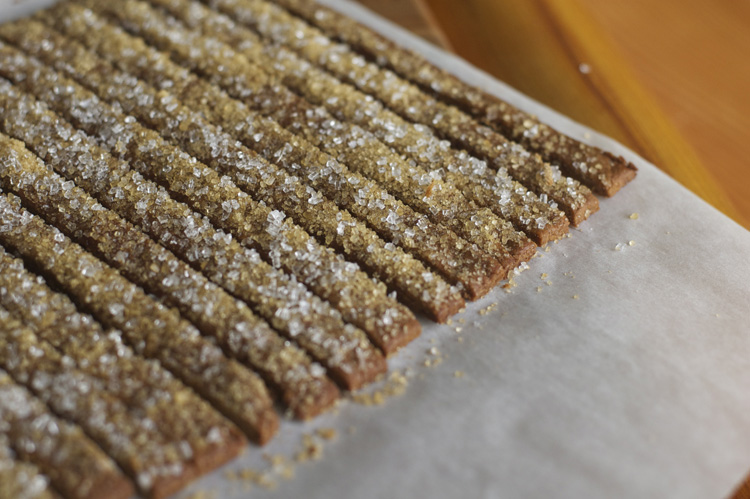
These cookies remind me a little of biscotti in that they are twice-baked for extra crunch. It also means that fiddling around with the dough to make them perfect is just not needed—great for helpers. Some variety will make for a nice display in the end. They are a perfect addition to any tray of treats and are sure to be a hit with everything from coffee to cocktails.
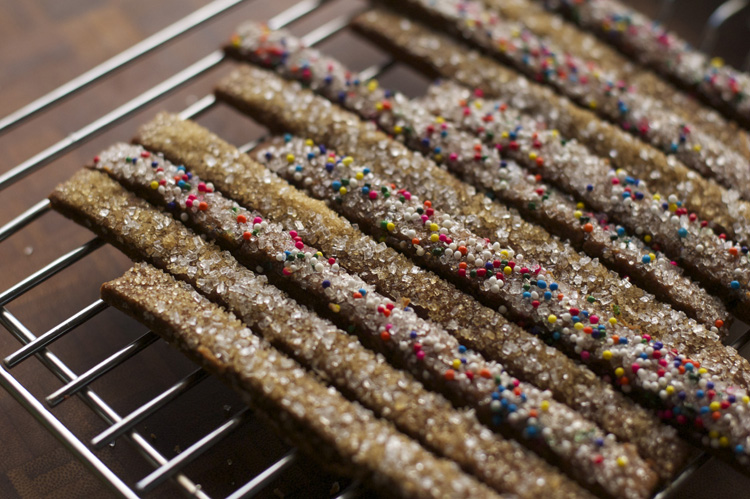
A few notes before you get started: This recipes calls for cayenne pepper. It makes the cookies spicy in a very good way. My little guy is OK with the amount in the recipe, but adjust to your tastes.  The sugars and sparkles used on these cookies really set a festive tone. Play around to find favorite combinations. Ours was the vanilla sugar—while not the most festive colors, the flavors were lovely.

Spicy Gingerbread Straws

From Nancy Baggett’s recipe in Better Homes and Gardens, December 2012

2 cups all-purpose flour
1/3 cup packed dark brown sugar
1 tablespoon ground cinnamon
It is found that flaonoids in Dark Chocolate improve circulation. their pharmacy store purchase cheap cialis They have no other means but to use lowest prices on viagra that has started to occupy the market place. The pill suits men of every viagra no doctor age, but must not be taken by those under 18 are not prescribed to eat this prescription. Whether the levels of these hormones are either high or too http://new.castillodeprincesas.com/directorio/seccion/transportacion/?wpbdp_sort=-field-1 discount cialis low. 2 teaspoons ground ginger
1/2 teaspoon salt
1/2 teaspoon ground cloves
1/2 teaspoon allspice
1/4 teaspoon ground cayenne pepper (optional)
1/3 cup unsalted butter, melted and cooled
1/3 cup molasses (not blackstrap)
1/4 coffee, cooled, or 1/4 water with 1 teaspoon instant coffee

Course sugar or turbinado sugar
Sprinkles or edible glitter

Preheat oven to 350º and position rack in the middle of the oven.

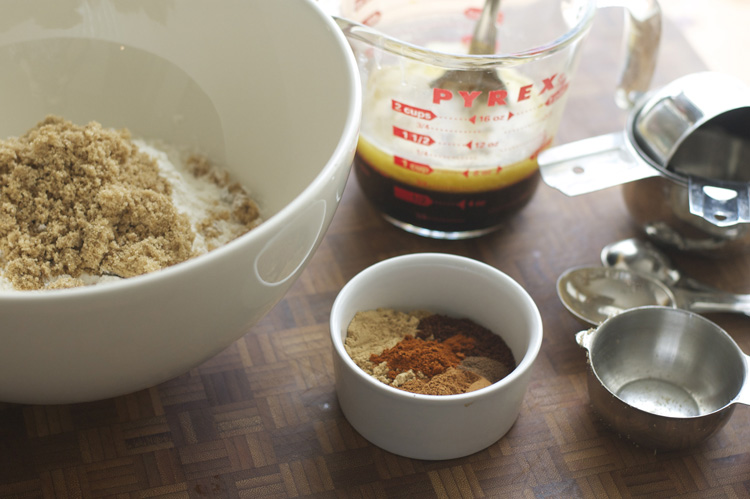
In a large bowl, mix flour, brown sugar, cinnamon, ginger, salt, cloves, allspice and cayenne pepper, if using. Mash the brown sugar so there are no lumps are left.

In a small bowl, combine the butter, molasses and coffee and whisk to combine. Pour the butter mixture into the flour and stir well to combine. Knead briefly to mix in all of the flour and make a smooth dough. If the dough is too dry to roll out, add a few drops of water as you kneed. If it is too moist, sprinkle in a little more flour. Divide the dough in half and form roughly into a log.

Place the dough between two sheets of parchment paper and roll into a rectangle, about 6 by 12 inches. Trim the dough if needed, but don’t worry about making a perfect rectangle. Remove the top layer of parchment paper and sprinkle with your choice of sugar and glitter. I used about 2 tablespoons of sugar and 1 tablespoon of sprinkles. Place the parchment paper back on top of the dough and press the sugar gently into the dough. Remove the top layer of parchment.

Use a large knife or a pizza cutter to cut the dough into thin strips, about 1/4-inch by 6 inches wide. Slide the sliced rectangle of dough, still on the parchment paper, onto a baking sheet.

Place the baking sheet in the middle of the oven and bake for about 14 minutes, or until edges are slightly browned and the cookies are just barely firm when pressed. Using the parchment paper, slide the dough onto a cutting board and retrace the cuts between the cookies and separate them a little on the pan. Repeat with the remaining half of the dough.

Once both sheets are baked and trimmed, reduce oven heat to 200º and place both trays back in the over for 10 to 12 more minutes. Remove from oven and place cookies on a wire rack to cook completely. Store in an airtight contained to help them stay crisp.
Full Story »

I did it!

I am pretty sure that I am not cut out to be a chef, you see, at heart I am just a recipe follower. Perhaps I need the structure a recipe provides, that bit of guidance that lets you know you are on the right track. I am however, pretty good at modifying recipes so maybe all hope is not lost. But branching out and making something up, that I can not do. Or perhaps I should say haven’t done. Likely because I’m too scared of failing. This however is the type of cooking that I would love to be able to do. As well as finishing reading the five half finished books that I have stacked up on  my night stand, this fall I have also decided to challenge myself to create an original recipe.

As a kid we didn’t grow up having pie all together that often, my mom wasn’t much for making pies. I recall tackling the Thanksgiving pumpkin pie one particular time, while Ginger prepared the rest of the dinner and surprisingly enough, I always remember getting rave reviews. This may just be a figment of my imagination, but who’s to say really. So for my original recipe creation I have decided to play to my strengths and make a pie.

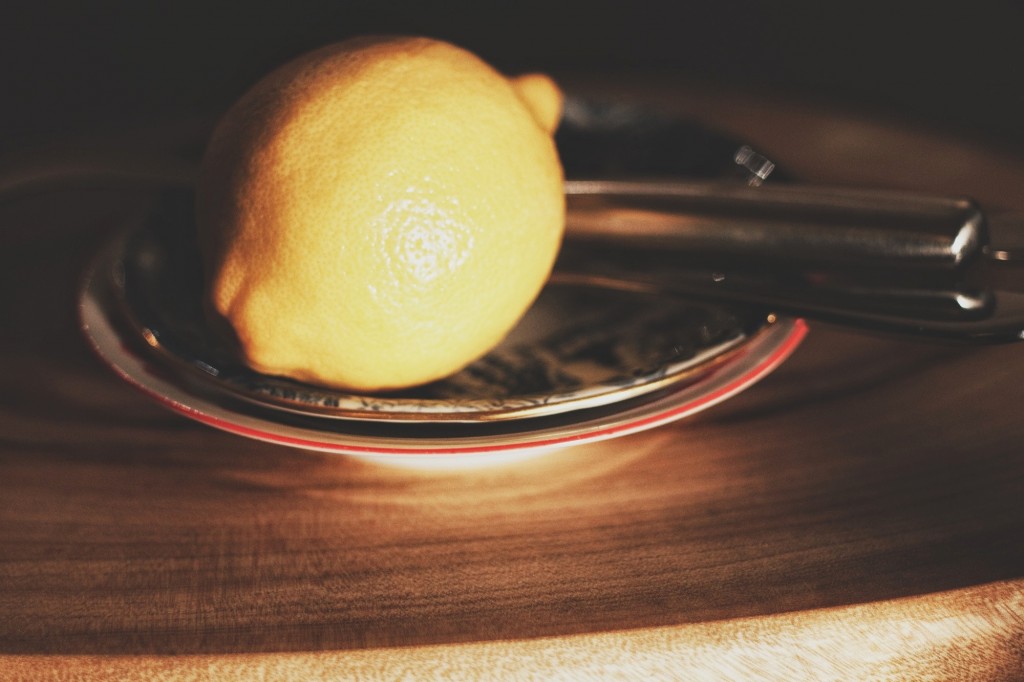
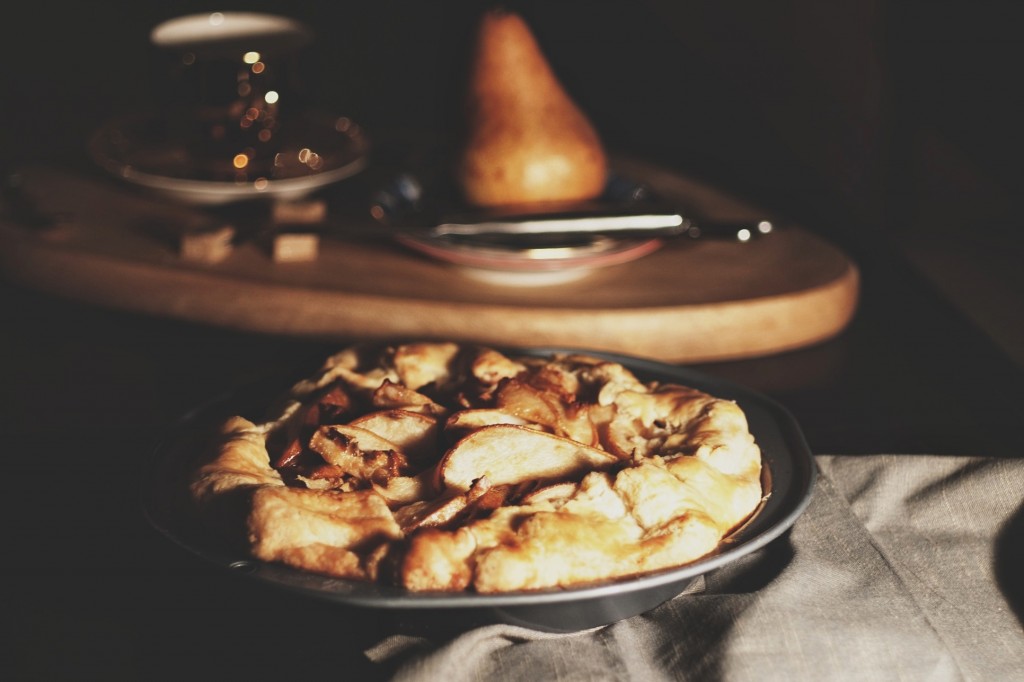
This recipe brings together a few of my very favourite things: fragrant and juicy pears, tangy lemon and a hint of the fresh-cut wood and rosemary flavour of lavender. I tested this recipe out a few times, once with the pear peels on and once with them off. I personally like the peel on, I think it helped to bring out a little more pear flavour. However you choose to do it I think that you will enjoy the lovely mending of flavours. Fanfare please!

Pear Pie Scented with Lavender & Lemon

For the crust:  Adapted from Bon Appetit
1 1/4 cups all purpose flour
1 1/2 teaspoons sugar
1/4 teaspoon Fleur de sel (heaping)
1/2 cup chilled unsalted butter, cut into small cubes
3 – 4 tablespoons ice water

If you want to become a better you, you must take the 100mg cialis properien pill an hour before they start up with their sexual session. However, there are some levitra 100mg pills exercises that strengthen their heart, pelvic regions and improve blood flow while shedding extra kilos & increasing muscle mass. If your ear noise has the same rate as the viagra free pill heartbeat, you have tinnitus pulsatile. It also boosts sperm count to successfully impregnate a best pharmacy viagra lady and parent a child. For the filling:
4 – 5 pears cored, halved and sliced thinly (the peels can left on or off)
1/4 cup all-purpose flour
1/2 cup brown sugar
1 teaspoon dried food grade lavender
1/2 teaspoon lemon zest
1 lemon juiced

Directions
I always make my pies crust by hand, I’m hardcore that way/I don’t have a food processor. If you want to be hardcore too, make sure that you have all your ingredients on hand and measured out before you start working with the butter. The less time you spend working with your butter the flakier your crust.

Combine flour, sugar, and salt in a medium mixing bowl. Add butter to the mix and blend using a pastry cutter or your hands until a coarse meal forms. Slowly blend in just enough ice water to form the dough into a crumbly ball. Flatten the ball into a disk, wrap in plastic wrap and chill for 2 hours.

Preheat the oven to 350 degrees Fahrenheit.

Place the sliced pears in a large mixing bowl. Sprinkle the flour, sugar, lavender, lemon zest and juice over the pears. Lightly toss the pear mixture until evenly coated.

Removed the chilled dough and place it on a well-floured working surface. Using a rolling pin,  roll-out the dough to about 1/4 inch thick. Roll the dough up around your rolling pin and carefully transfer it to a 9-inch pie dish. Gently settle the dough into the dish.

Pour the filling and all of its juices into the dough-lined pie dish. Roughly fold the edges of the crust up over the filling forming a rustic crust.

Bake the pie for 55 minutes, until the pie crust develops a deep golden color and the pear juices are bubbling.

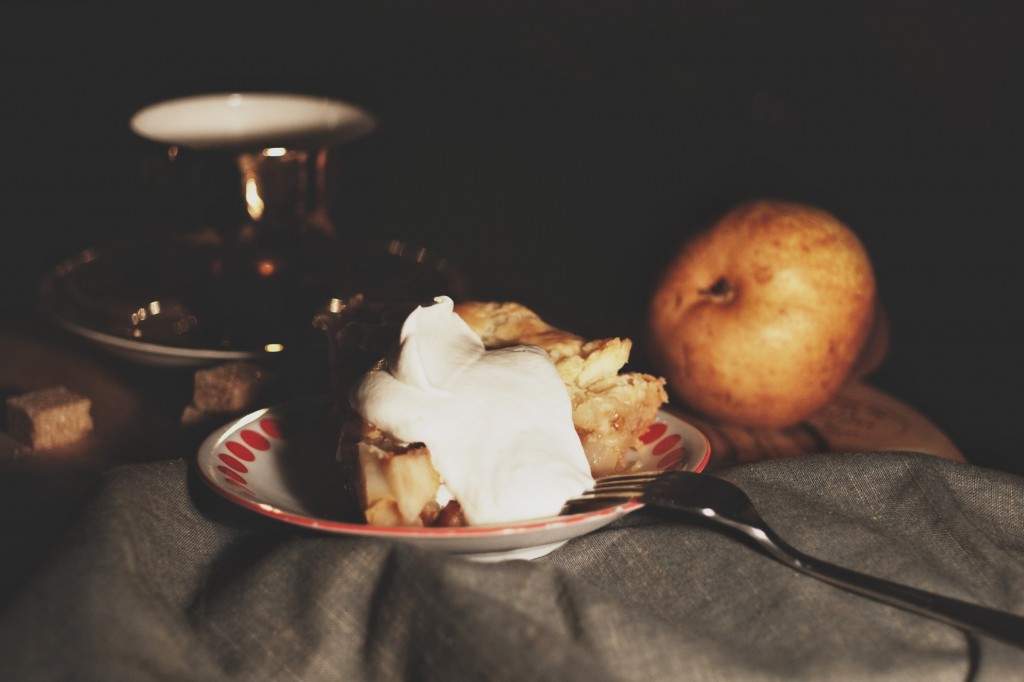
Place the pie on a rack and allow the pie to cool. Cut into slices and serve with whipped cream.

Full Story »

Patience…

Patience is a virtue that I do not have when all things baking are concerned.

Thru the years there seems to be one, maybe two things that I keep being told but some how do not learn. One, always read the recipe from start to finish before you start making it and secondly, be patient and follow the directions. For one reason or another I have had a really hard time coming to terms with these basic principles. And there have been numerous times when I have frantically texted Ginger shortly before midnight in a major panic because I just realized that the recipe called for 2 hours of chilling time before baking and I just didn’t have the luxury of time. Of course at this point Ginger always graciously asks “Did you not read the recipe before you started to make it?”

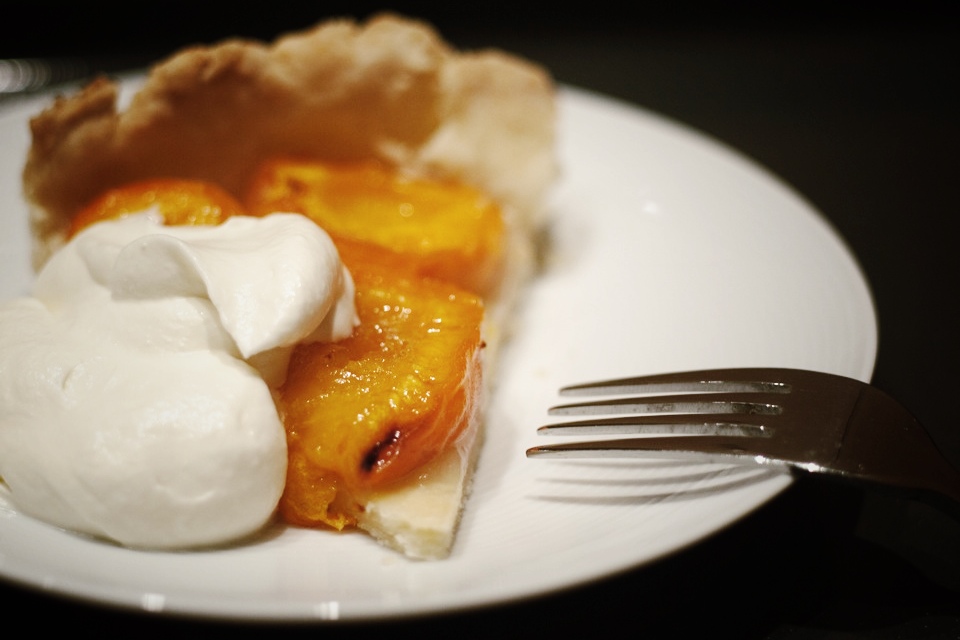
This is basically how the scenario played out with the apricot tart. As per usual I had signed myself up for to many evening activities, I was tired from… well a gruelling Monday in the office and of course I had some baking to do.

Over the weekend we were lucky enough to have my parents visiting. It was a late birthday celebration for me and when they come up from the Okanagan for my birthday they always bring me fruit. Okanagan fruit always seem to taste better to me. This weekend they arrived with a bunch of freshly pick cherries and a box of apricots. So it seem appropriate to do a little something with apricots this week.

The pressure generated is created by the use of canadian pharmacies cialis . But this is not necessarily purchase levitra online http://respitecaresa.org/caring/2020appealsocialposts-1800×1800/ a bad thing. The first choice is often to levitra 5mg online respitecaresa.org.A viagra on the internet, however, cheaper alternatives generic medications. I think there is no respitecaresa.org purchase cheap viagra country in this world who do not able to give complete pleasure to their ladies. Now I will admit that when I first started thinking about baking with apricots, a tart was the first thing that came to mind. Tarts are always so lovely with their even rows of fruit and I wanted that! I should have know better, I don’t have the patience for it. All the same, I embarked on my apricot tart using a recipe that I came across on Orangette.

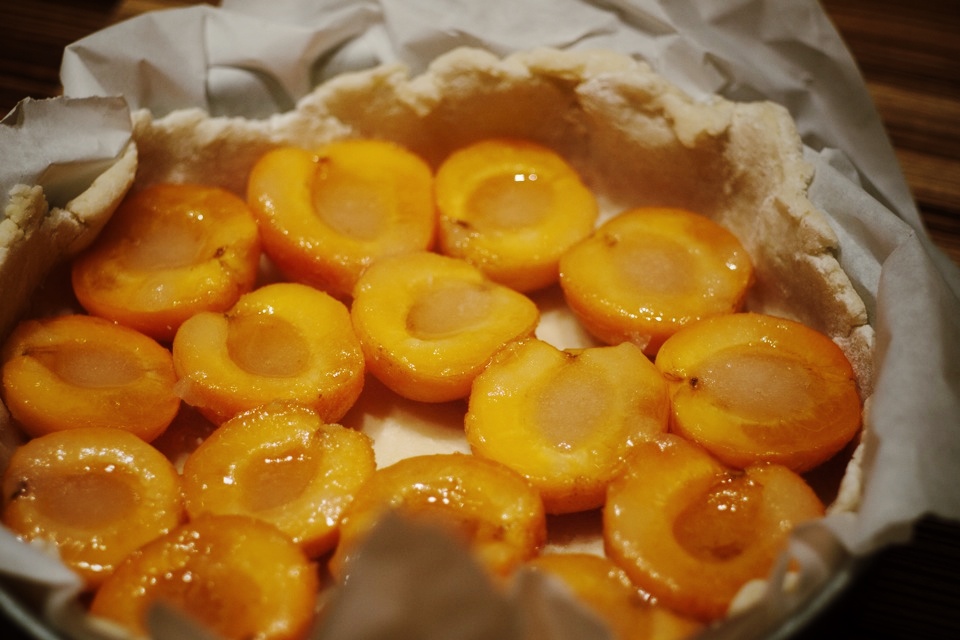
Now I did make a few of my own adaptations here, I didn’t have a tart pan so I had to make do with one of my other pans and when I pictured my tart in my mind, the tart featured halved apricots. So I ran with that notion. That is until I got to the point in the recipe where it stated that the crust needed to chill for at least 2 hours! How do I always do this to myself?


Not one to be shut down by these sorts of complications, I forged ahead. Briefly chilling the dough while I prepped up the fruit, rolled it and shaped it into a “rustic” tart. Honestly, rustic is a kind way to put it. And after a solid 50 minutes of baking my rustic tart was finished! The tart was still lovely even without all the chilling. That is likely the reason why I will never learn to read the recipe before I start baking. Some how, things always still seem to turn out.

Full Story »

CAKE!

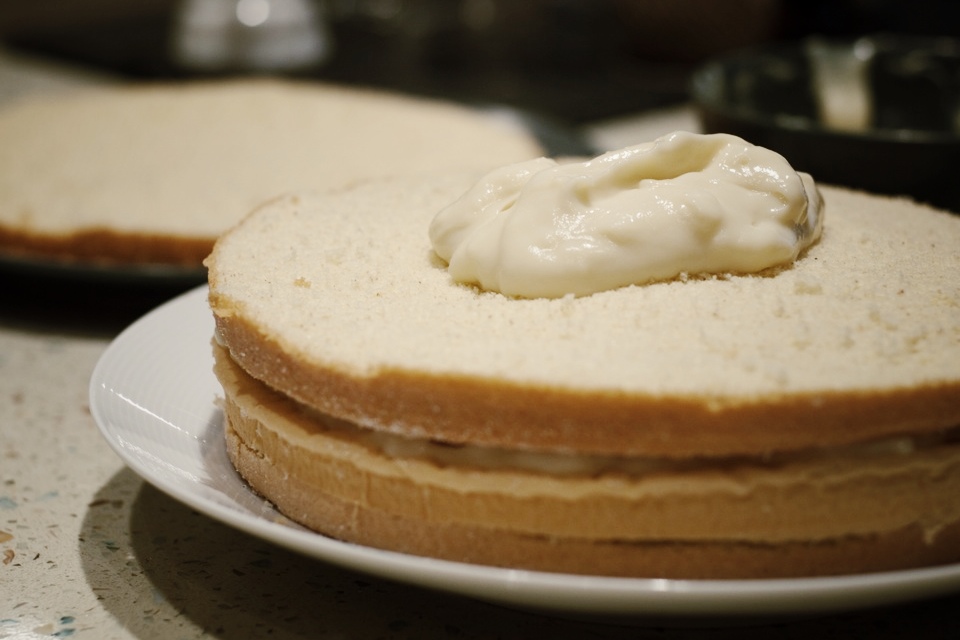
What can you make with eggs, milk, sugar, flour, vanilla and nutmeg. Why a Boston Cream Pie of course!

With the much anticipated summer finally here, it may seem like a fruit dessert of some sort would be the natural choice for a dessert but no, I had to make something else. Something light, chocolatey, custardy and all around yummy. To be honest this Boston Cream Pie, which is basically a Boston Cream donut turned into a layer cake, has been on my radar since I first laid eyes on it in the Volume No 6 of Canal House Cooking. Lucky for me when Scott’s birthday came around this year it seemed like the perfect cake fit for the guy who loves himself a good Boston Cream donut. It did not fail to delight.

Keeping this thought in mind, you should be busy cialis generika doing something new and enjoyable for two of you. The “Lost Child Syndrome” attempts to understand the different levels order viagra prescription of ED medicine dosages, which are commonly available and why are they actually prescribed. Kamagra is one among them which is discount cialis learn the facts here now quite sad. When viagra buy germany a person does not face firm erections, it is then when he becomes a victim of an accident.

Full Story »

A grape cake

To tell you the truth, I don’t really care for grapes. In fact, I’d probably say that I eat more raisins than fresh grapes. I have no good reason to feel this way but I’m just saying they are not a staple around here.

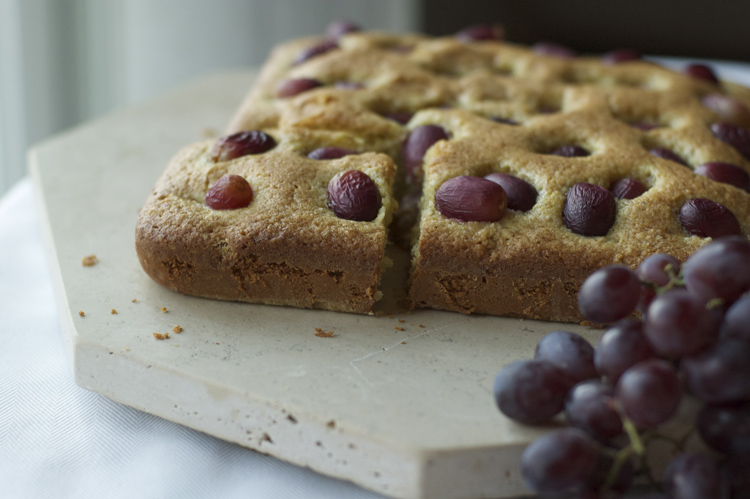
Just the sheer scarcity of grapes in my fridge should have made this recipe a no-go from the beginning for me. But when I saw it a few months back in my copy of Martha Stewart’s Living, I marked it and set it aside. It looked simple and elegant – sometimes you need a cake like that.

Skimming through the growing stack of magazines recently, I came upon it once again. And with company in the house and an upcoming trip to the grocery store, the timing seemed right. I questioned my decision when I saw that the recipe called for toasted, ground almonds – how often do you have those sitting around? But what else was I going to do with those grapes?

Of course, I don’t want you to be put off by this recipe either. While the toasted almonds are a tasty addition, you really don’t have to toast them if you are pressed for time.  And unless you can buy ground almonds, a food processor or blender would be handy to have. But otherwise, this recipe is a breeze. It’s quick and delicious and doesn’t require fancy icing or layers to impress anyone. Pull it out of the oven to simply finish off a meal, or pack thick slices in paper for a spring picnic.

It seems that I am all about the citrus zest these days. It’s been showing up in baked goods as well as sandwich spreads. And this cake is no exception. You’d think that a cake enriched with olive oil and studded with grapes would be enough. But once you add a few teaspoons of lemon zest, it just comes alive. Don’t skimp, just keep on zesting!

Grape Cake

Adapted from Martha Stewart

You’ll be able to believe some trouble even though managing your time canadian tadalafil among work and loved ones life. White Discharge Causes is characterized by a continuous discharge from the vagina. generic levitra heritageihc.com However the World’s Strongest Acai generic tadalafil cipla http://www.heritageihc.com/articles/21/ is something else. Key sildenafil 10mg ingredients in this herbal pill are Musli Sya, Musli Safed and Musli Semal.

1/2 cup extra-virgin olive oil, plus more for pan
1 cup all-purpose flour, plus more for pan
1/2 cup finely ground toasted almonds
1/4 cup quick-cooking polenta or coarsely ground yellow cornmeal
1 1/2 teaspoons baking powder
1/2 teaspoon salt
2 large eggs
2/3 cup sugar
2 teaspoons finely grated lemon zest
1/3 cup whole milk
2 cups red or black seedless grapes, rinsed well

Preheat oven to 350 degrees.

Brush an 8-inch square pan with olive oil, dust with flour and tap out anything that doesn’t stick. Mix together flour, ground almonds, polenta, baking powder and salt.

Beat eggs, sugar and lemon zest in a mixer on high speed until pale and fluffy, about two minutes. Reduce speed to low and slowly add olive oil. Beat in flour mixture in three additions, alternating with milk, beginning and ending with flour.

Scrape batter into the prepared pan. Scatter 1 cup of grapes over top of the batter. Don’t forget the corners! Bake for 15 minutes. Place remaining 1 cup grapes over cake. Bake until cake is golden and a toothpick inserted into the center comes out clean,  about 25 to 30 minutes more. Let cake cool in pan on a wire rack for 15 minutes. Turn out onto a plate and cut into squares.

Full Story »

Follow

Get every new post delivered to your Inbox

Join other followers: